Draw Clamp Welding Fixture: Hold Shell Ends Flat to Prevent Weld Warping
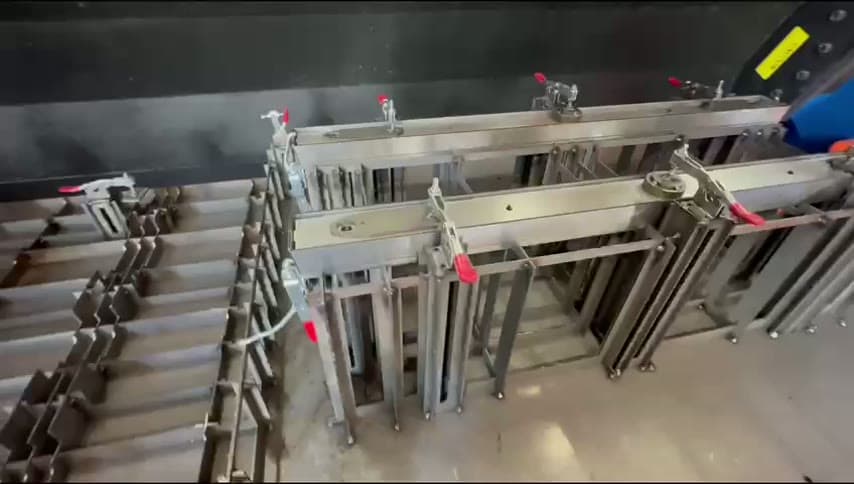
Use draw clamps to pull shell ends flat against fixture slats so welding heat does not warp the part.
- Creator
 JCR Lean Ninjas
- Company
- JCR Lean Ninjas
- Wastes
The outer shells on the AMR cards were warping during welding because the welds were on the top at the slots, with no welds on the outer surface to help hold the shape.
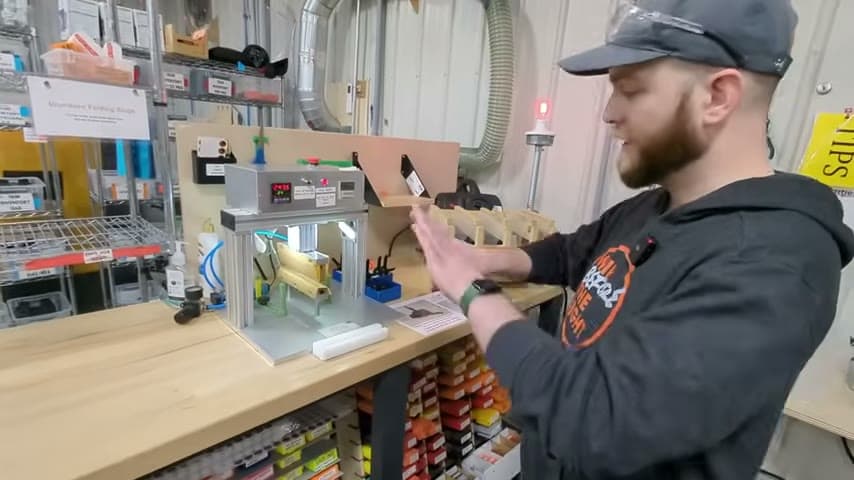
The team added draw clamps that pull both shell ends down and hold the plate flat against the fixture slats during welding.
Build proven weld knowledge into the fixture so the right setup is repeatable.
What is a Draw Clamp Welding Fixture?
A draw clamp welding fixture is a holding method that pulls a workpiece into a fixed reference position before welding starts. In this case, the draw clamps pull both shell ends flat against fixture slats.
The fixture slats act as the flat reference. The clamps make the desired position visible and repeatable, so the shell is held the same way each time before weld heat can pull it out of shape.
This turns a learned countermeasure for warped shells into part of the fixture, instead of relying on each person to remember or rediscover how to hold the part.
Why it works
It reuses a proven anti-warp setup, adds value by protecting part shape, and mistake proofs the weld fixture so the known error is harder to repeat.
- Makes the correct setup visible, the shell ends must be pulled flat to the fixture slats before welding.
- Reuses the lesson from warped shells, so operators do not have to solve the same distortion problem again.
- Mistake proofs the setup by physically holding both ends in the intended position during the weld.
- Adds value by preventing a defect at the source instead of correcting a warped shell later.
Evidence: The transcript states the outer shells were warping as they welded, and the improvement statement says draw clamps pull both shell ends flat to fixture slats to prevent weld warping.
How to create this idea
- 1Find the warp source
Identify where the part lifts, bows, or twists during welding. Note which welds create heat without enough restraint, such as one-sided welds.
- 2Choose the flat reference
Use fixture slats or another fixed surface as the datum for the correct flat position. Make the contact points clear and repeatable.
- 3Add draw clamps
Place draw clamps so they pull both shell ends down to the reference surface. Set the clamp location so the part is held flat without damage.
- 4Standardize the load sequence
Document the order, load the shell, seat it on the fixture slats, close the draw clamps, then weld. Make the clamp check part of normal setup.
- 5Make the lesson visible
Label the fixture or add a setup photo showing the correct clamped condition. This helps the next user reuse the countermeasure instead of repeating the warping problem.
Best used when
- weld warping
- thin shells
- one-sided welds
- repeat fixtures
- flatness defects
Less useful when
- one-off welding
- no distortion issue
- no fixture reference
- parts cannot clamp
Tags
- Problem
- defectsweld warpingdistortion
- Lean methods
- mistake proofingknowledge reusestandard work
- Application
- weldingfixture designfabrication
Captured from JCR Lean Ninjas at JCR Lean Ninjas in the video "Make the fixture eliminate defects! AMR cart welding improvements.", at 00:00:06. On Lean Toolbox. Watch the original video on YouTube ↗