Adjustable Rack Brackets: Make One Modular Rack Fit Larger Parts
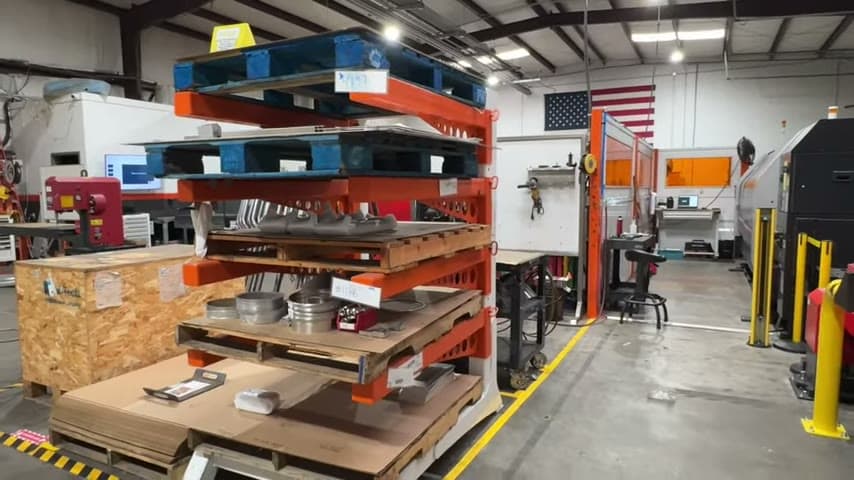
Movable rack brackets let one small staging rack fit different part sizes while limiting inventory to one pallet.
- Creator
 American Precision Engineering
- Company
- American Precision Engineering
- Wastes
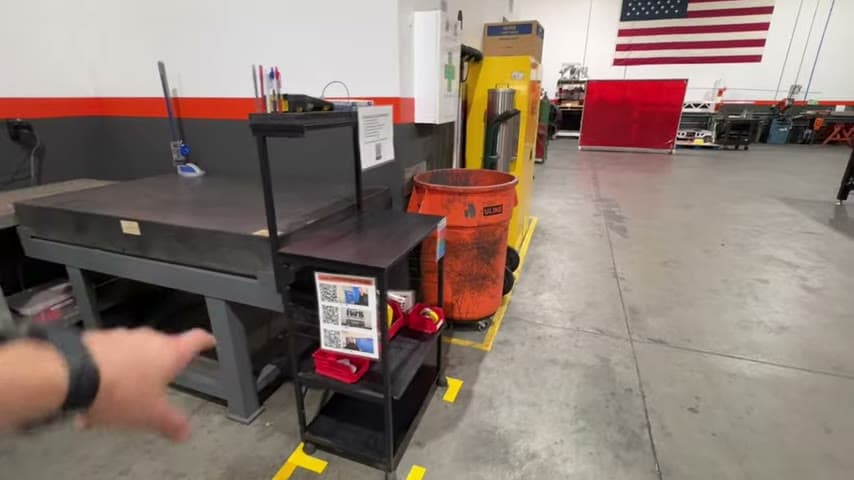
Kits waiting for bought out material, parts, or hardware need to be staged before welding, but fixed rack spacing may not fit larger parts and oversized storage can invite excess inventory.
The team made modular racks themselves with brackets that adjust up or down for bigger parts, and sized each rack small on purpose so it only fits a pallet.
Make a proven storage design adjustable, visible, and hard to overfill.
What is a Adjustable Rack Brackets?
An adjustable rack bracket is a movable support point on a rack. Instead of fixing every shelf or support position for one part size, the bracket can move up or down when a larger part needs space.
In this example, the rack stages formed parts and hardware while the kit waits to be completed before going to welding. The same rack design can be reused across different part sizes because the bracket positions are modular.
The rack is also capacity limited. It is made small on purpose so it only fits a pallet, turning the pallet space into a visible inventory limit instead of open storage.
Why it works
The rack reuses one proven staging design while adding value to the next process and mistake-proofing both fit and inventory control.
- Knowledge reuse: A modular bracket pattern gives the team a repeatable rack idea instead of redesigning storage whenever a larger part appears.
- Added value: The rack supports kit completion before welding, so storage serves the flow of ready work rather than becoming a general holding area.
- Mistake-proofing: Movable brackets reduce the chance that a fixed opening will block a larger part, and the one-pallet size makes overfilling harder.
Evidence: The transcript says the team made the racks modular so the brackets can adjust up and down for bigger parts, and made them small on purpose because excess inventory is waste.
How to create this idea
- 1Choose the staging point
Find where parts or kits wait before the next process, such as before welding. Confirm what must be present before the kit can move on.
- 2List part sizes
Identify the normal and larger parts that need to fit on the rack. Use real parts or current kits, not guesses.
- 3Add movable brackets
Build the rack with bracket positions that can move up or down. Keep the adjustment simple so the same rack can be reused for different part sizes.
- 4Set the capacity limit
Decide how much inventory the rack should allow. If the rule is one pallet, size the rack so only that pallet amount fits.
- 5Make the pattern standard
Copy the same modular bracket layout on future racks. This makes the storage solution visible and reusable instead of relying on local fixes.
- 6Test before releasing
Load a normal kit and a larger part. Check that the parts fit, the pallet limit is obvious, and the kit can be staged for the next operation.
Best used when
- varied part sizes
- kit staging
- before welding
- inventory limits
Less useful when
- single part size
- temporary storage
- unlimited buffer
- fragile parts
Products and tools mentioned
- Hardware: Included in the staged kit before it moves to welding.
- Rack brackets: Used as adjustable support points that move up or down to fit larger parts.
- pallet: Used as the physical capacity limit for the rack.
Tags
- Problem
- excess inventorypoor fitwaiting kits
- Lean methods
- mistake-proofingstandardizationvisual limits
- Application
- material handlingkittingwelding
Captured from American Precision Engineering at American Precision Engineering in the video "Tour of APE's lean shop", at 00:07:10. On Lean Toolbox. Watch the original video on YouTube ↗