3D Printing In-House Fixtures and Jigs for Same-Day Iteration
Design a fixture, print it, and hold it the same day to close the feedback loop fast.
- Creator
 Audacity Micro
- Company
- Henry Holsters
- Wastes
Waiting on outside vendors or machine shops for custom fixtures and jigs stalls process improvement, because each design revision means days of lead time before you learn whether it works.
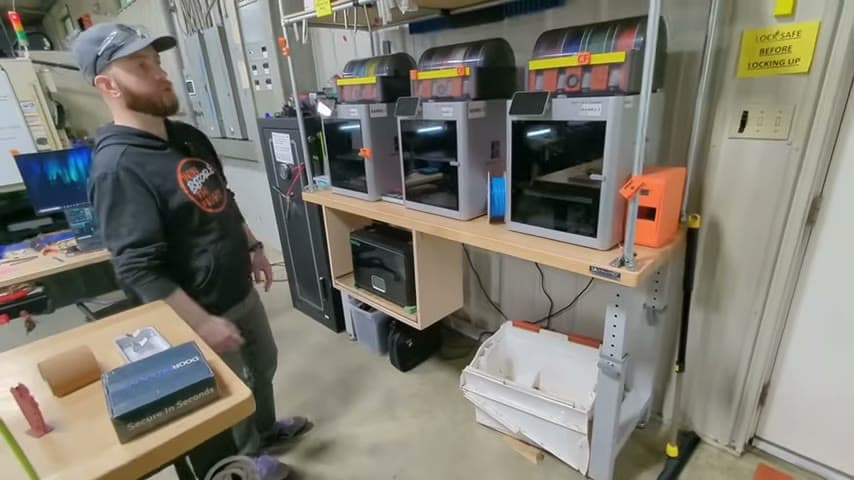
The team keeps 3D printers on-site as a force multiplier for making lots of small tools, experiments, fixtures, and jigs. They rapidly design a part, print it, and usually have it in hand the same day to test and refine.
Shorten the design-to-feedback loop so improvements can be tried, proven, and reused quickly.
What is a 3D Printing In-House Fixtures and Jigs for Same-Day Iteration?
A 3D printer builds a physical part directly from a digital model, layer by layer, without tooling or setup for each new design. On a shop floor it turns a CAD sketch into a usable fixture, jig, or test part within hours.
Here the printers are used not for finished products but for the constant stream of little tools and experiments a team needs: fixtures that hold a part in place, jigs that guide an operation, and quick trial pieces to check an idea. Some prints go straight into a dryer for stuff that needs to be dried before use.
The key value is speed of iteration. Because you can design something and hold it the same day, a bad design is caught and revised immediately instead of after a multi-day vendor wait.
Why it works
Same-day printing makes proven fixture designs visible, reusable, and cheap to improve.
- Every working jig becomes a digital file the whole team can reprint or modify.
- Fast feedback lets you fail cheap and lock in the good version quickly.
- In-house iteration captures shop-floor knowledge in tangible, repeatable tools.
- Removing vendor lead time eliminates the waiting waste between design revisions.
How to create this idea
- 1Put printers on the floor
Keep 3D printers close to where fixtures and jigs are used so anyone can design and print without leaving the work area.
- 2Design small and specific
Aim the printers at the constant flow of small tools, experiments, fixtures, and jigs rather than large finished products.
- 3Print, hold, and test same day
Turn a design around fast enough to have it in hand and try it the same day you drew it.
- 4Add post-processing as needed
Keep a dryer or finishing station nearby for parts that need to be dried or cured before use.
- 5Save proven files
Store the CAD files for fixtures that work so the design can be reprinted or improved by anyone later.
- 6Iterate on feedback
Revise the model as soon as testing reveals a flaw and reprint, keeping each loop short.
Best used when
- custom fixtures
- frequent iteration
- small tooling
- prototyping jigs
Less useful when
- high-volume production parts
- high-load metal fixtures
- no CAD capability
Products and tools mentioned
- 3D printer: Additive manufacturing machine that builds custom parts, jigs, and fixtures from digital models.
- dryer: Appliance or machine for drying parts, materials, or textiles.
Tags
- Problem
- vendor lead timeslow iterationwaiting
- Lean methods
- rapid prototypingfixtures and jigsfast feedback
- Application
- shop floortoolingprocess improvement
Captured from Audacity Micro at Henry Holsters in the video "THIS is what a LEAN shop looks like - Lean Machine Shop Tour", at 00:02:54. On Lean Toolbox. Watch the original video on YouTube ↗